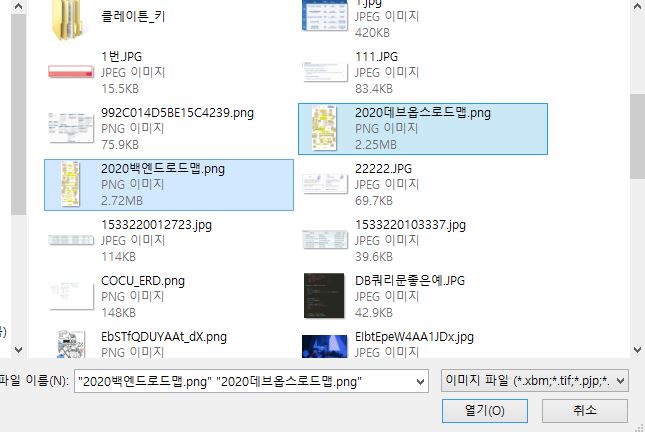
multer를 이용해서 사진 여러개 올리기 정말 힘드네요.
코드 수정이랑 새로고침을 몇 번이나 했던지 ㅠ
single파일 올리는 건 쉬워서 여러개 올리는 것도 별 거 아닌줄 알았는데 끙
다음에 다른 프로젝트 할 때 이때를 회상하며 쉽게 일하라고 올립니다.
아직 초심자의 단계라서 어렵게 돌아가는 걸 수도 있어요. 더 쉬운 방법이 있다면 댓글로 알려주시면 감사하겠습니다.
사용되는 파일
1. main.ejs (Client)
2. twit.js (Client)
3. post.js (Server)
1. html : main.ejs
<form
            id="twit-form"
            action="/post"
            method="post"
            enctype="multipart/form-data"
            name="twit-form"
          >
            <div class="form-group">
              <textarea
                id="twit"
                name="content"
                maxlength="140"
                class="form-control"
              ></textarea>
            </div>
            <div class="img-preview"></div>
            <div>
              <label id="img-label" for="img">사진 업로드</label>
              <input
                id="img"
                name="img"
                type="file"
                accept="image/*"
                multiple
              />
              <button id="twit-btn" type="submit" class="btn">업로드</button>
            </div>
</form>
- multer를 사용하면 form에 꼭 enctype="multipart/form-data"를 써줘야합니다.
- file 다중업로드를 하기 위해선 input type="file" 옆에 꼭 multiple 넣어주세요.
- <div class="img-preview"></div> 여기에 미리보기 사진 동적으로 추가할 겁니다.
2. twit.js (클라이언트 쪽 javascript입니다. main.ejs에서 <sciprt></script> 사이에 쓰고 저장가능)
if (document.getElementById("img")) {
  let uploadNum = 0; //올린 사진 셀 변수
  let index = 0; //img 에 붙일 index
  document.getElementById("img").addEventListener("change", function (e) {
    const formData = new FormData(); //서버로 보낼 이미지 form
    const length = this.files.length;
    const max = 4; //사진 최대 4장까지
    switch (uploadNum) {
      case 0:
        if (length > max - uploadNum) {
          alert("사진은 최대 4장까지만 가능합니다.");
          return;
        }
        uploadNum += length;
        break;
      case 1:
        if (length > max - uploadNum) {
          alert("사진은 최대 4장까지만 가능합니다.");
          return;
        }
        uploadNum += length;
        break;
      case 2:
        if (length > max - uploadNum) {
          alert("사진은 최대 4장까지만 가능합니다.");
          return;
        }
        uploadNum += length;
        break;
      case 3:
        if (length > max - uploadNum) {
          alert("사진은 최대 4장까지만 가능합니다.");
          return;
        }
        uploadNum += length;
        break;
      default:
        alert("사진은 최대 4장까지만 가능합니다.");
        return;
    }
    console.log("업로드한 사진 : ", uploadNum);
    console.log("현재 올린 사진 : ", this.files);
    for (let i = 0; i < length; i++) {
      formData.append("img", this.files[i]);
      index++;
    }
    axios.post("/post/img", formData).then((res) => {
      let url = JSON.parse(res.data);
      console.log(url);
      let img_html = "";
      for (let i = 0; i < url.length; i++) {
        console.log("미리보기", url[i]);
        img_html += `<div class="img-preview${index}">
                  <img id="img-preview${index}" src="${url[i]}" width="250" alt="미리보기">
                  <input id="img-url" type="hidden" name="url" value="${url[i]}">
                  </div>`;
        console.log("json 길이 : ", url.length);
        console.log("서버통신index:", index);
        console.log(img_html);
      }
      $(".img-preview").append(img_html);
    });
  });
}
- 우선 img가 있는지 확인합니다. 올릴 수 있는 최대 파일 개수는 4로 정했습니다. switch문으로 4장 넘는지 확인하고
넘지 않으면 올린 파일 개수 더해줍니다.
- id가 "img"인 input file을 선택하면("change"이벤트발생) formData에 넣습니다.
- formData를 ajax로 서버에 넘깁니다. 통신이 잘 됐다면 json파일을 받은 후 parsing합니다.
- 빈 html 변수에 json으로 받은 파일 경로를 html형식으로 넣어줍니다. (미리보기 사진 올리기 위함)
- main.ejs 의 img-preview 다음에 jquery 로 html문을 추가해줍니다.
참 파일저장 폴더는 /upload인데 경로 /img로 한 이유는 app.js에서 /img는 정적폴더인 /upload로 가게 되어있습니다.
3. post.js (NodeJS 서버쪽입니다. 프레임워크는 Express 사용)
const multer = require("multer");
const path = require("path");
const fs = require("fs");

fs.readdir("uploads", (error) => {
  if (error) {
    console.error("uploads폴더가 없어 uploads폴더를 생성합니다.");
    fs.mkdirSync("uploads");
  }
});

const upload = multer({
  storage: multer.diskStorage({
    destination(req, file, cb) {
      cb(null, "uploads/");
    },
    filename(req, file, cb) {
      const ext = path.extname(file.originalname);
      cb(null, path.basename(file.originalname, ext) + Date.now() + ext);
    },
  }),
  limits: { fileSize: 5 * 1024 * 1024 },
});

// 사진 upload에 저장하고 전달해서 미리보기
router.post("/img", upload.array("img", 4), (req, res) => {
  console.log("파일 이름 : ", req.files);
  let urlArr = new Array();
  for (let i = 0; i < req.files.length; i++) {
    urlArr.push(`/img/${req.files[i].filename}`);
    console.log(urlArr[i]);
  }
  let jsonUrl = JSON.stringify(urlArr);
  res.json(jsonUrl);
});

const upload2 = multer();

//none() 쓰면 오류나서 array씀
router.post("/", upload2.array("img", 4), async (req, res, next) => {
    console.log(req.body.content);
    console.log(req.body.url); //올린 사진 개수에 따라 배열로 나옴
    try {
      const post = await Post.create({
        content: req.body.content,
        //img: req.body.url,
        userId: req.user.id,
      });
      res.redirect("/");
    } catch (error) {
      console.error(error);
      next(error);
    }
  }
);
- 파일은 /upload 폴더에 저장합니다. 폴더가 없으면 생성합니다.
- 변수 upload는 multer 설정변수입니다. 파일 이름은 중복되면 안되니까 올린 시간을 붙여줍니다.
- router.post("img")는 multer 미들웨어를 사용합니다. 다중 파일이니까 array("img",4)써줍니다.
img는 main.ejs에서 <input type="file" name="img" >의 name을 가져온겁니다. 4는 파일 최대 개수.
- ajax로 받아온 이미지파일이 담긴 formdata를 multer로 설정한 파일이름과 경로를 for문으로 돌려서 클라이언트에
보내줄 배열에 저장합니다 배열을 JSON으로 변환시켜서 보내줍니다.
- router.post("/")는 main.ejs에서 submit 버튼을 눌렀을 때 form을 가져옵니다.
첨부파일 외 다른 나머지는 req.body로 받아옵니다.
- img url은 업로드한 개수만큼의 배열로 받아집니다. for문 돌려서 img db에 추가하면 됩니다!


다중 파일 저장하기 위해선 post table에 있던 img 컬럼을 .
img table을 새로 만들어서 저장해야합니다.
'개발기록' 카테고리의 다른 글
| Error about String type parameter - Uncaught SyntaxError: Unexpected end of input (0) | 2021.03.03 |
|---|---|
| jQuery 를 이용한 태그 추가, 삭제 (0) | 2021.01.25 |
| VSCode에서 solidity version 빨간 밑줄일 때 (0) | 2020.10.31 |
| truffle 오류 cannot find module 'connect-private-to-provider' 해결하기 (0) | 2020.10.29 |
| url에서 window.location.pathname이용해서 파일경로 알아내기 (0) | 2020.10.13 |

